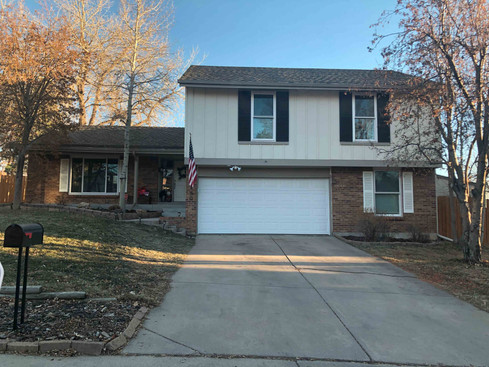
3 Steps for Taking a Visioneering Homes Photo
- Brad

- Dec 11, 2018
- 3 min read
Updated: Mar 30, 2019
Our clients rave about how unique, fun, and exciting it is for them to see their homes Visioneered! There’s something exciting about seeing a fresh color palette and new features that tickles the fancy; and honestly, it's probably more fun and exciting for us to help homeowners limit their frustrations and find clarity in their designs!
But before we can help you find a vision for your home, we need a good foundation to build upon, that is to say, we need a great picture of your home. As far as equipment is concerned, there’s no need to use an expensive camera, your smart phone camera will work just fine as long as you follow these few steps.
Step 1: Remove the Extras
First, start by moving the cars out of the driveway and remove things like the garbage cans out of view. Think of your house as a blank slate, everything in the way may hinder the ability to see a beautiful blank canvas or the finer details of your home.
Step 2: Avoid Shadows & Darkness
Second, pay attention to how the sun affects your photo. If the house is completely or mostly in shadow it's more difficult to get a true read on the color. The absolute best photos are taken on overcast days when the sun isn't casting harsh highlights and shadows across your home. The next best thing is taking photos at dusk or dawn while the sun is lower in the sky. Below are some examples of how the sun affects your photo in a negative way.
The first image is totally in shadow and it's hard to see the clay/red color of the home because of how dark the front of the home appears. A photo taken on an overcast day would drastically improve the image quality. The second image (besides the beautiful tree and not-so-pretty portable toilet in the parkway) has dramatic shadows cast across the front of the home. These highlights + shadows make the color selection vary so dramatically, it's difficult to get a good idea what the color of your home will look like.
The above photos are better examples of good photos to Visioneer your home! Even though the sun is still fairly high in the sky on the first photo, the entire front of the home is pretty evenly lit. There aren't dramatic highlights or shadows scattered across the front isn't fully darkened by shadow, concealing the details. The second photo is an example of a photo taken at dusk. This photo too has an evenly lit front without harsh shadows.
Step 3: Get the Composition Right
Lastly, look at the composition of your shot. We recommend centering your shot from the front door from the ground level. This is the best angle that most people will see when they approach your home. If you can't get the entire house/yard into one shot, that's okay! From that very same spot just take a few photos to the left and right of your home and we can stitch them together to get one panoramic view of your home! Lastly, check to make sure the photos aren't blurry!
If you aren't sure your photo is perfect for your Visioneering project, no sweat! There is a no risk consultation before each project where we can help give you further direction for how to take the perfect photo that will render the best results! Contact us anytime at: visioneeringhomes@gmail.com. And if you haven't already be certain to stop by our website to see more project examples and how our clients feel about our services!


Comments